Author Archive

Internet of Things

Thursday, October 29th, 2015

What is the “Internet of Things” (or IoT for short)? The “internet of things” is devices and appliances that have been internet enabled (they have an internet connection). A prime examples of this done well are Nest and Hive, both allow you to monitor your homes energy use and set the temperature to name only a couple of features.
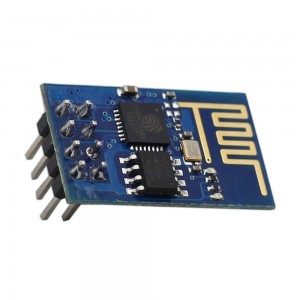
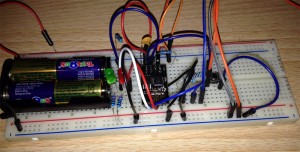
ESP8266 (ESP-01)I decided to take a look at this area and see what would be achieved. I knew there were a few options for connecting to the internet from the Raspberry PI to Arduino (with an ethernet shield) and others. These are great platforms and make it really easy but I wanted to see how cheaply it would be done. I did some searching and encountered the ESP8266 (see picture, this one is an ESP-01), I found one selling for £2.49. These are marketed as a Wifi transceiver for devices like the Raspberry PI and Arduino, but that isn’t the whole story. The ESP8266 has a on board 32 bit processor with at least 512kb of memory (some versions have more) and some free GPIO pins (general purpose input/output…it means we can control other things), the ESP-01 has 2 other versions have more GPIO (more pin more things you can control). You’re probably thinking…so. Well as it has it’s own processor and memory it can perform loads of operations for us without the need for an external micro-controller. This is great, it’s cheap we don’t need more processors and we can still control things.

Out of the box it’s pretty basic you can send it simple AT commands (similar to the old days of modems), with a couple of commands it will connect to your WIFI station and get an IP address, with a few more commands it will get a web page. In all honesty that is kind of tedious but thankfully the developers of the board released an SDK so people could develop their own firmware for the board (the software that makes it work). Once people had the SDK new and easier to use firmwares were developed the one i’ve decided to use is call NodeMCU. NodeMCU works really well and in just a few commands it will operate as a web server. On the page mine served it had four buttons, the four buttons turned a couple of LEDs on and off. That might sound basic but it is the essence of what most modern electronic do, consider a home security system, the panel that arms the system just sets some logic that waits for conditions to be met.

esp8266 in circuit

Security

There has been a lot of press recently about the security of IoT devices and they’re quite right earlier versions would be pretty easy to hack, it’s worth keeping in mind that the systems are based on software and it can be upgraded. What steps should be taken, as IoT devices as connecting to your Wifi network make sure the passwords are strong (a weak password will easily let someone in). Don’t access the devices setting from insecure networks.
3D Printer

Wednesday, September 30th, 2015

At the start of the year I decided to build a 3d printer. I’d never attempted anything like this before but after lots of reading a looking up details  I thought I’d give it go.

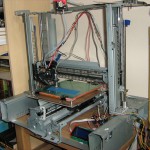
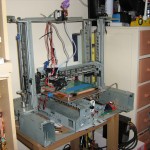
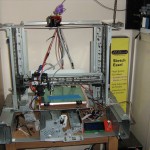
My goal was to keep the costs as low as possible, I wanted to see exactly how cheaply you could make a 3d printer. My research told me I needed stepper motors and that old inkjet printers might have them. Luckily I had an old Epson Stylus Color 600 and after stripping the casing off low and behold 2x 200 step stepper motors (brilliant). Now all I needed was 3 more.

I started off by looking at recycling mailing lists to see if anyone was throwing any away, at first I just collected any printers that came up, this unfortunately led to a lot of disappointment as most of the one I found where much too recent and used DC motors and linear encoders to position the rollers and print head; not what I had in mind. Or the printer contained steppers but they weren’t up to the job (some only had 48 steps or simply couldn’t provided enough torque). At this point I decided to try ebay to see if any where going for sale and after a couple of months 3 turned up at once, I promptly purchased them (very cheaply).

So now I had the printers, I’d ordered a ramps board and arduino atmega2560 from ebay and some pololu drivers (word of warning, buy good driver boards…the first one I got didn’t work properly). I then order a heated bed, hot end, PTFE tubing, lead screws and nuts (I purchased some expensive ones…but you could just but threaded rod from a DIY store…much cheaper) and finally coupling between the lead screws and motors.

Next how was the printer going to be constructed. I looked at various designs and decided on Cartesian. The eagle eyed amongst you might’ve noticed I didn’t buy any stainless steel guide rods. I decided rather than reinvent the wheel I was going to use some of the structure from the original printers (they are after all square and aligned). I left one of the printers mostly intact and mounted the heated bed to inkjet carriage (this would form the Y axis). One of the printers I cut down to just the inkjet carriage  (this would form the X axis). With the remains two printers bodies forming the Z axis (X was mounted on the carriages of each printers and the lead screws ran though part of the body with the nuts for the lead screws mounted to the carriages. The motors for the Z axis are mounted at the bottom of the printer.

If you would like more details or have a project you think I can help with please drop me an email.

reprap 3d printer Repstrap 3d printer Scratch Built 3d printer

Genetic Algorithm

Monday, September 14th, 2015

I decided to try making a genetic algorithm at the weekend, this one is pretty basic and is based on words and letters but could be expanded to do anything. The script is written in Javascript and should make a good base for making more complex versions. As with all Genetic Algorithm designing the test for fitness will still be the hardest part.

Give it a try

Sprites VS Individual Images

Tuesday, September 9th, 2014

As I’m building sites I come across a whole range of useful tools and gadgets that help me work faster.

This little tool allows you to build sprites. What is a sprite I hear you cry? A sprite is collection of small images or tiles that have been grouped into on file.

Visit the Sprite Pad site

Why would I want to use one? A lot of emphasis has been placed on making websites load quicker and run faster. Using a sprite means you only have to download one file instead of lots.

Eh? There are a couple of reasons why this helps.

1) An picture isn’t just the image, you also have a header at the beginning of the file. The header tells the browser what type of file it is so it knows what to do with it. If you download just one sprite you only have to download one header instead of a header for each file (less waste).

2) When an image is included on your website a request is made for the file. It can take a fraction of a second for the server to reply and the download to start. Hang on “A fraction of a second”? Because the request for the file is made for each file you are multiplying the number of fractions you have to wait. In this way you save time by  requesting a bigger file (the sprite) than the individual files.

sprite-file-size


Icon Fonts

Tuesday, September 9th, 2014

IcoMoon is a web app that creates fonts. These fonts are little different to the type you would normally use in a word processor, these fonts contain icons that can be used throughout your website. This is another size saving tool, a font file is smaller than storing lots of little images (yes you could use a sprite). The benefits of using a font is that they will scale to almost any size and will still look good, the downside is that a fonts are monochrome.

Visit the IcoMoon website