3D Printer
At the start of the year I decided to build a 3d printer. I’d never attempted anything like this before but after lots of reading a looking up details I thought I’d give it go.
My goal was to keep the costs as low as possible, I wanted to see exactly how cheaply you could make a 3d printer. My research told me I needed stepper motors and that old inkjet printers might have them. Luckily I had an old Epson Stylus Color 600 and after stripping the casing off low and behold 2x 200 step stepper motors (brilliant). Now all I needed was 3 more.
I started off by looking at recycling mailing lists to see if anyone was throwing any away, at first I just collected any printers that came up, this unfortunately led to a lot of disappointment as most of the one I found where much too recent and used DC motors and linear encoders to position the rollers and print head; not what I had in mind. Or the printer contained steppers but they weren’t up to the job (some only had 48 steps or simply couldn’t provided enough torque). At this point I decided to try ebay to see if any where going for sale and after a couple of months 3 turned up at once, I promptly purchased them (very cheaply).
So now I had the printers, I’d ordered a ramps board and arduino atmega2560 from ebay and some pololu drivers (word of warning, buy good driver boards…the first one I got didn’t work properly). I then order a heated bed, hot end, PTFE tubing, lead screws and nuts (I purchased some expensive ones…but you could just but threaded rod from a DIY store…much cheaper) and finally coupling between the lead screws and motors.
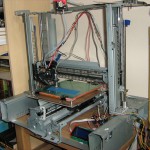
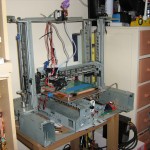
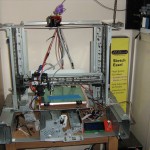
Next how was the printer going to be constructed. I looked at various designs and decided on Cartesian. The eagle eyed amongst you might’ve noticed I didn’t buy any stainless steel guide rods. I decided rather than reinvent the wheel I was going to use some of the structure from the original printers (they are after all square and aligned). I left one of the printers mostly intact and mounted the heated bed to inkjet carriage (this would form the Y axis). One of the printers I cut down to just the inkjet carriage (this would form the X axis). With the remains two printers bodies forming the Z axis (X was mounted on the carriages of each printers and the lead screws ran though part of the body with the nuts for the lead screws mounted to the carriages. The motors for the Z axis are mounted at the bottom of the printer.
If you would like more details or have a project you think I can help with please drop me an email.


